Smart Energy imposes security protocols above and beyond a normal ZigBee network. Devices join the encrypted Smart Energy network using a pre-shared link key or installation code (installation codes are hashed into link keys). In a Smart Energy network, each device can have its own link key or installation code. After a device joins the network it will initiate key establishment.
During key establishment the trust center will establish an APS key with the device. This key is used to encrypt critical data between the trust center and the joining device so that no other device can decrypt the data portion of the message. The trust center can also establish APS keys for any two authenticated devices so that they can securely communicate as well.
Key establishment utilizes certificates on both the trust center and joining device to authenticate that the device has been certified. Generally certificates are either production certificates or test certificates and all devices on a network must be of the same type. The ConnectPort X2e for Smart Energy and the ERT/Smart Energy Bridge are manufactured with compatible production certificates.
The following generic steps need to be taken for a device to join:
Unpack the ERT/SE Bridge but do not connect power.
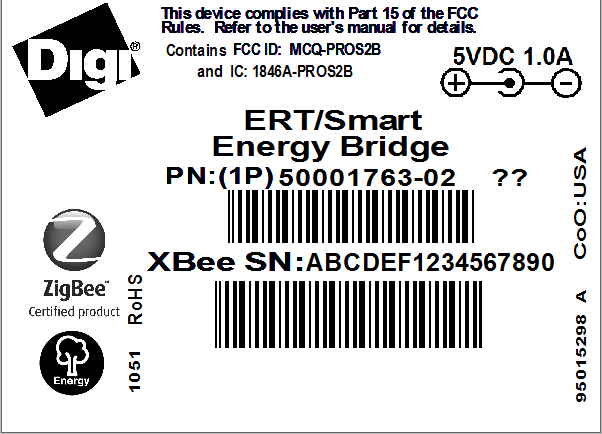
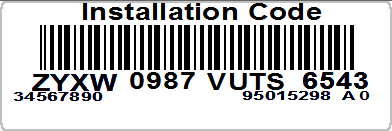
On the ERT/SE Bridge locate the product information sticker pictured below. In the following steps XBee SN and Installation Code will be registered with the ConnectPort X2e for Smart Energy.
Navigate to https://www.livesmartlee.com and log in or create an account.
Add the Connectport X2e you just configured to your Smartlee account.
Follow the directions on Smartlee to add your ERT Smart Energy Bridge to your Zigbee SE Network. Smartlee will automatically install appropriate drivers.
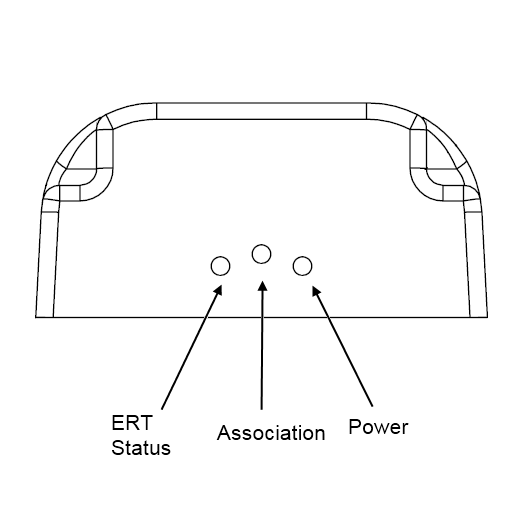
The Associate LED on the ERT/SE Bridge will begin blinking slowly when joined to a Smart Energy network. When not joined the Associate LED is solid on.
If necessary, the ERT/SE Bridge can also be removed from the ZigBee SE network in one of the following ways.
Login to the Digi Smart Energy Web Tool, open Debug from the menu, and select your ConnectPort X2e for Smart Energy gateway.
Note
The remove_device request unregisters a Smart Energy device with the Trust Center on the ConnectPort X2e for Smart Energy. For more information on this request see remove_device.
The Digi Smart Energy Web Tool generates a sample remove_device request. The parameter must be adjusted to match the ERT/SE Bridge.
<remove_device>
    <device_address type="MAC">11:22:33:44:55:66:77:88</device_address>
</remove_device>
Click Execute.
2011-2014, Digi International Inc. All rights reserved.