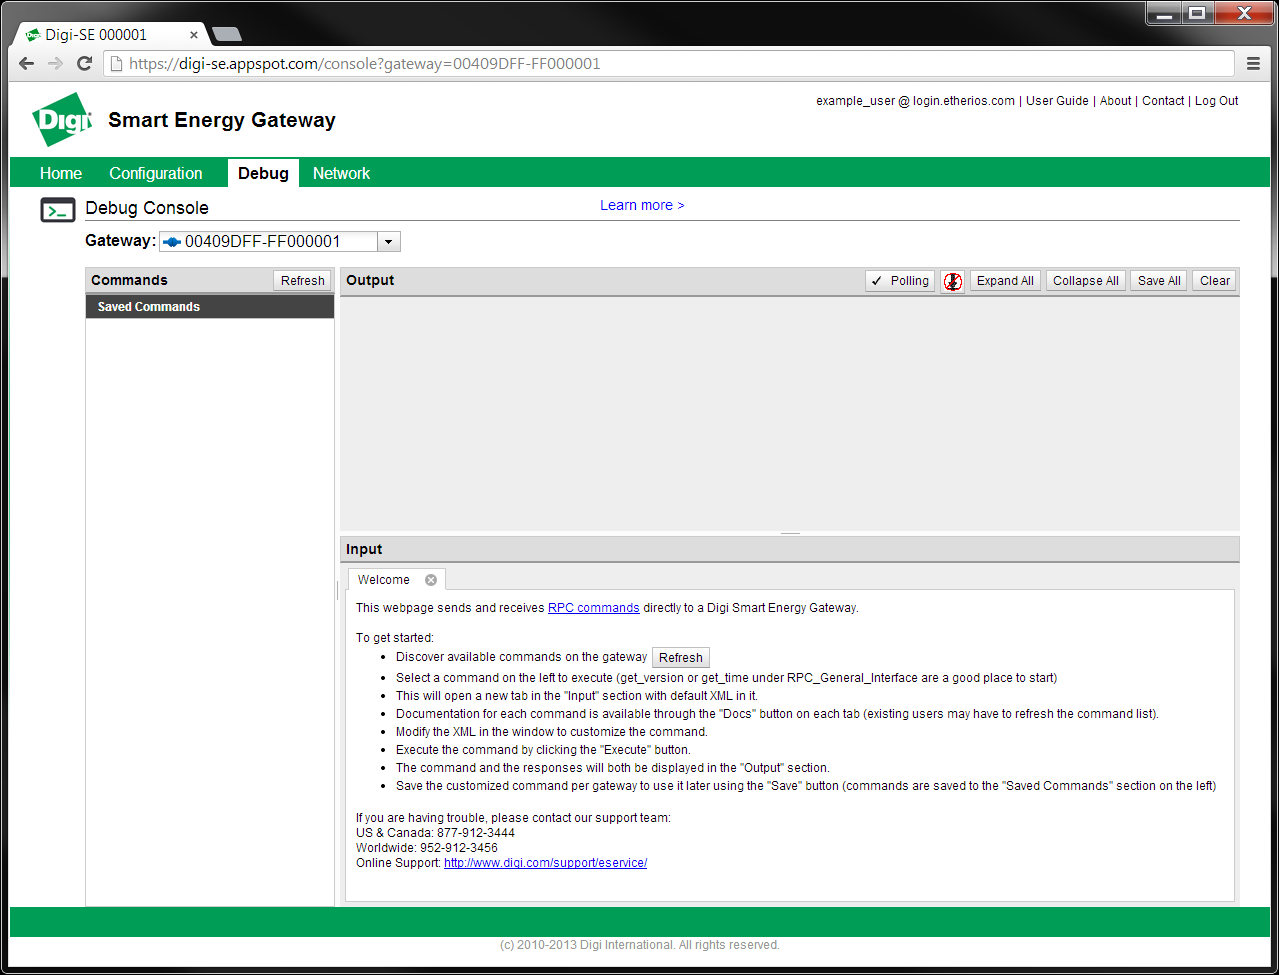
This page makes it easy to send and receive RPC messages directly to a Digi gateway. See RPC Requests and Responses for more information.
https://digi-se.appspot.com/console allows a developer to:
You’ll need a Digi Smart Energy gateway that is connected to Device Cloud. See Devices for more information.
Go to https://digi-se.appspot.com/console and select your Digi gateway from the Gateway dropdown (see Gateway Selection).
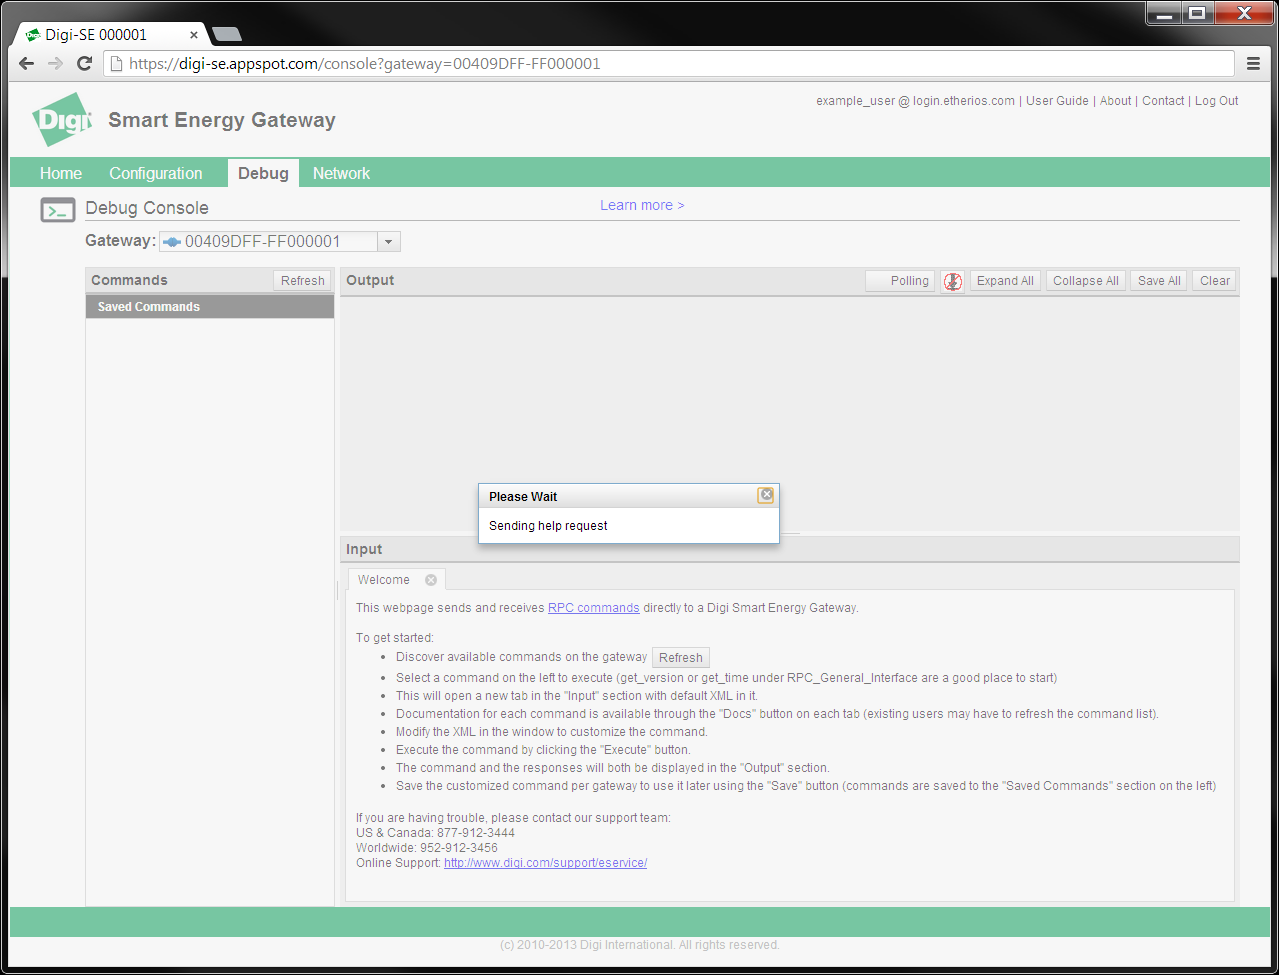
Discover the available commands on your gateway by clicking the button labeled “Refresh” in the upper left. This will send the help command with the “methods” option to the gateway and open a dialog to tell you the progress of requesting the command list. The page will refresh with the new commands on success. On failure an error will be displayed, make sure that your gateway is connected to Device Cloud and running the Smart Energy Framework.
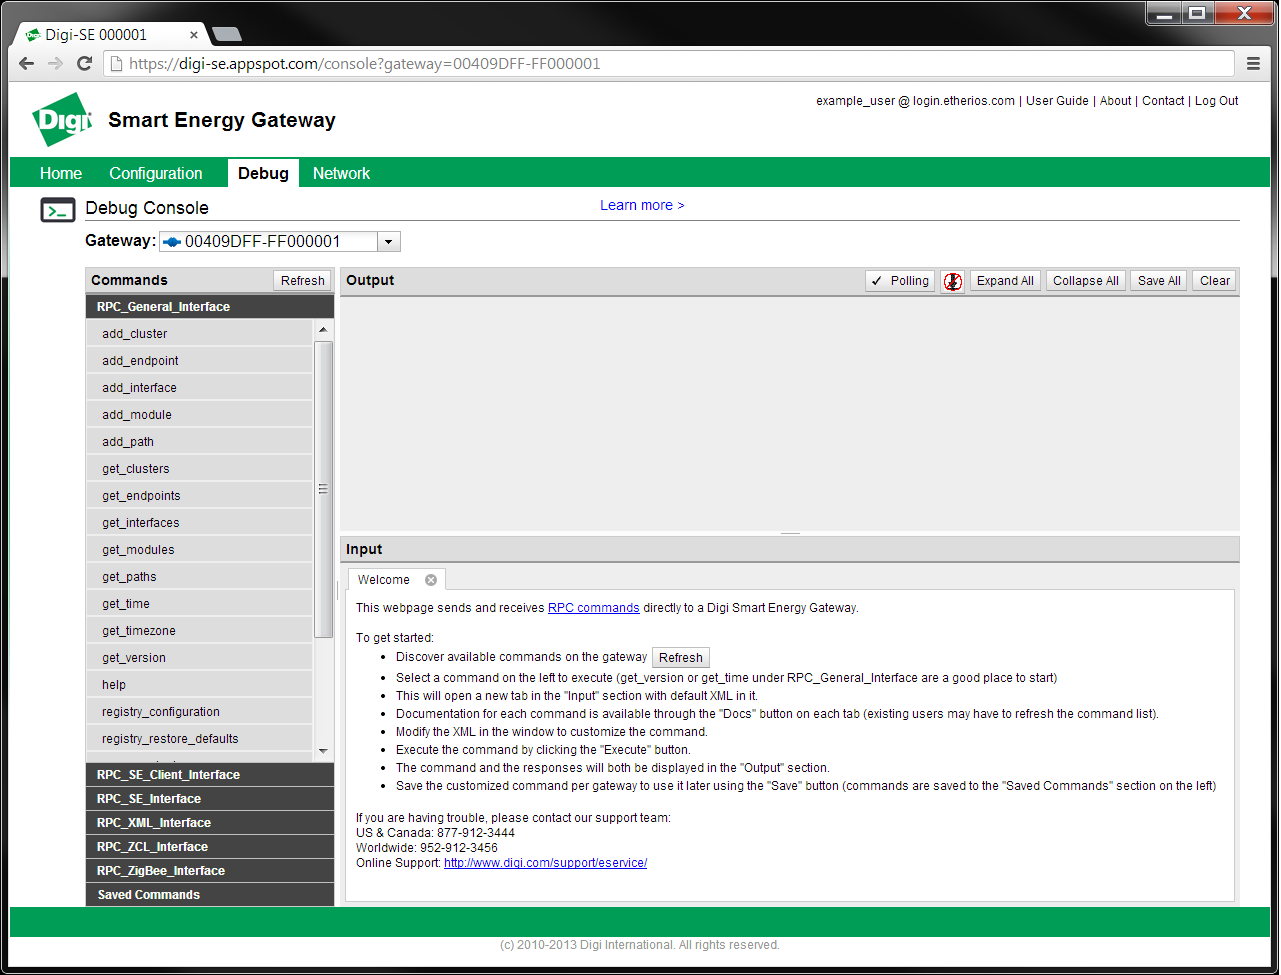
You should now have all of the available commands listed on the left in the Commands pane. These commands are organized by Interface. See Interface Reference to learn more.
You can now proceed to sending and receiving.
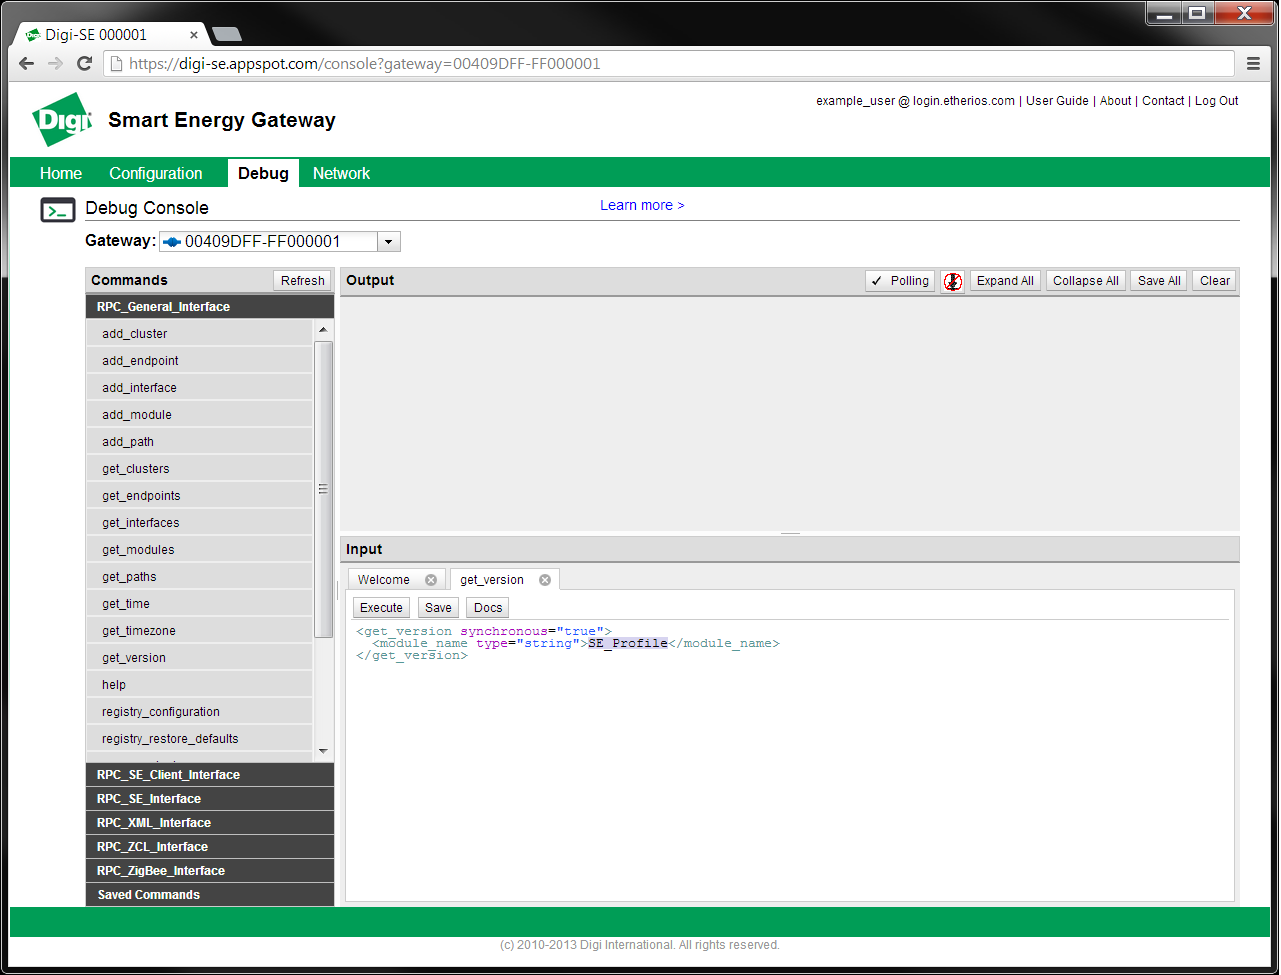
Go to https://digi-se.appspot.com/console and select your Digi gateway from the Gateway dropdown (see Gateway Selection). Make sure you have already discovered the available commands (see Discover Available Commands). The page should look like the following:
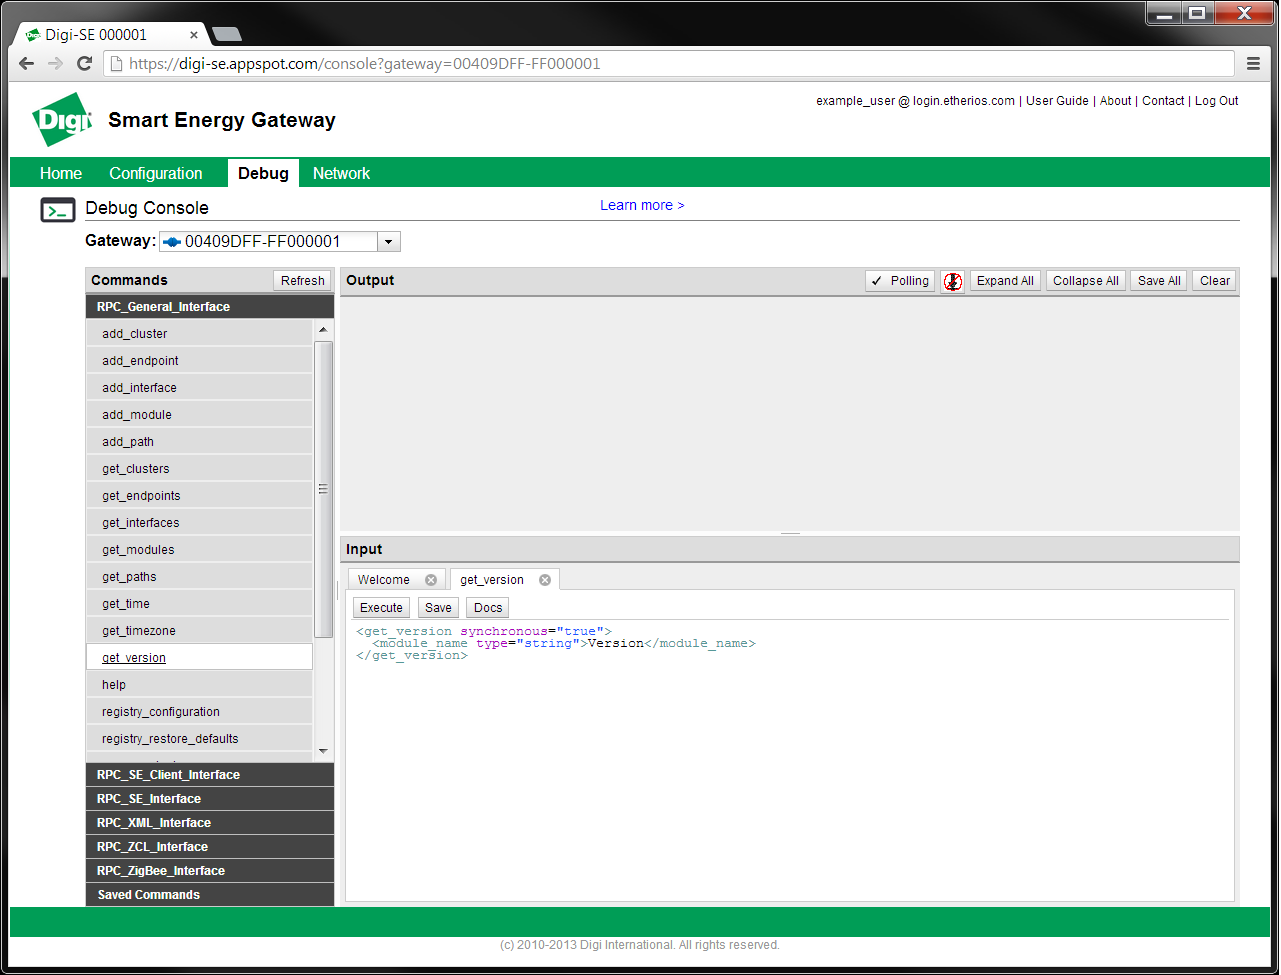
Select the command you want to be able to send from the Commands pane on the left by clicking it. For this sample, we will be using the get_version command. This will load the command into a tab in the Input pane. The command will load with default XML.
Clicking the button labeled Docs will open a new tab with documentation for the selected command.
You can modify the XML for the command directly in the window.
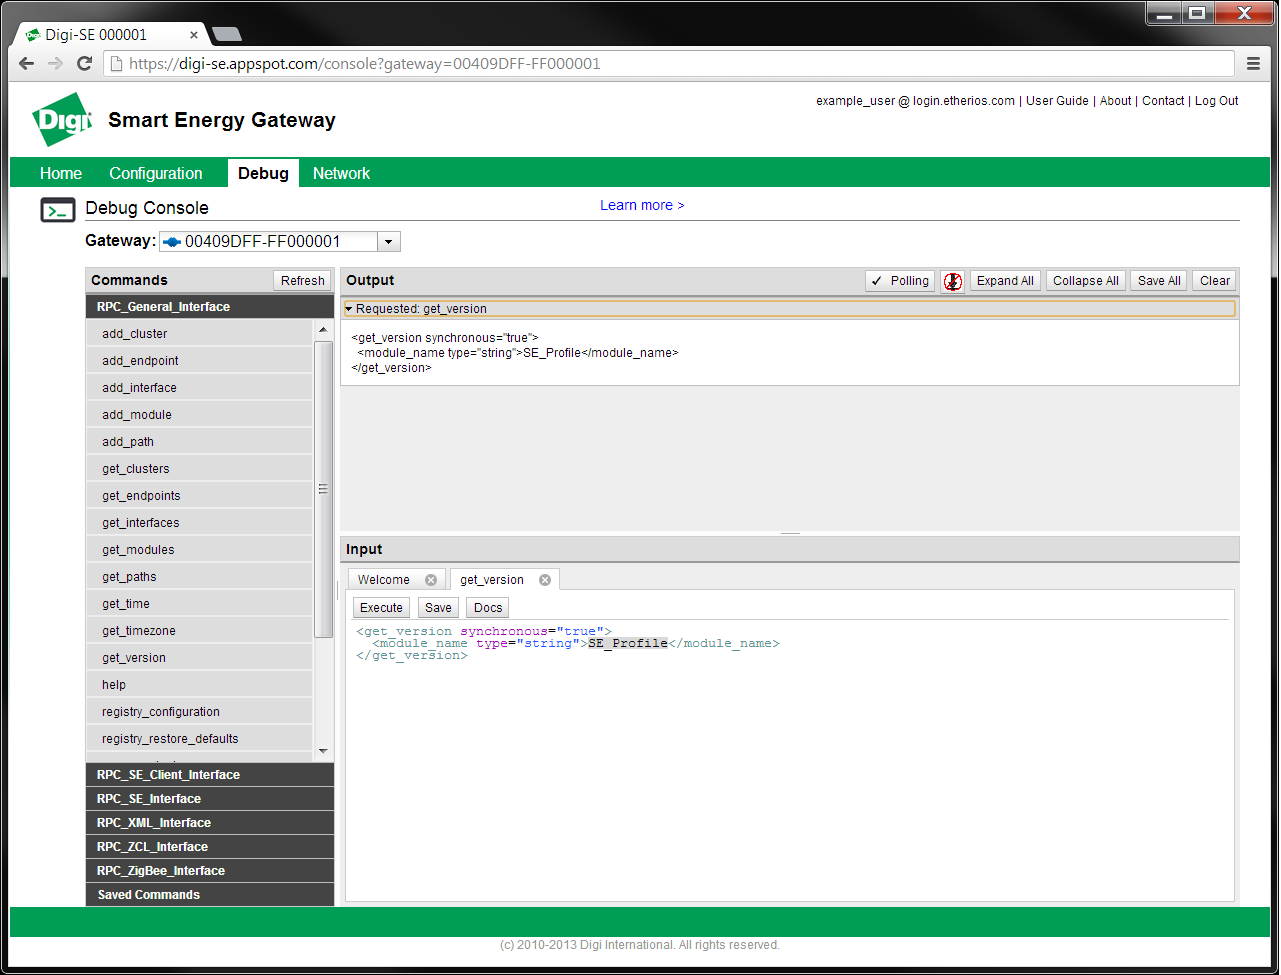
Click the button labeled Execute to send the command to the gateway. The sent command should show up in the Output pane, labeled “Requested: get_version”. You can click this box to display the contents of the command.
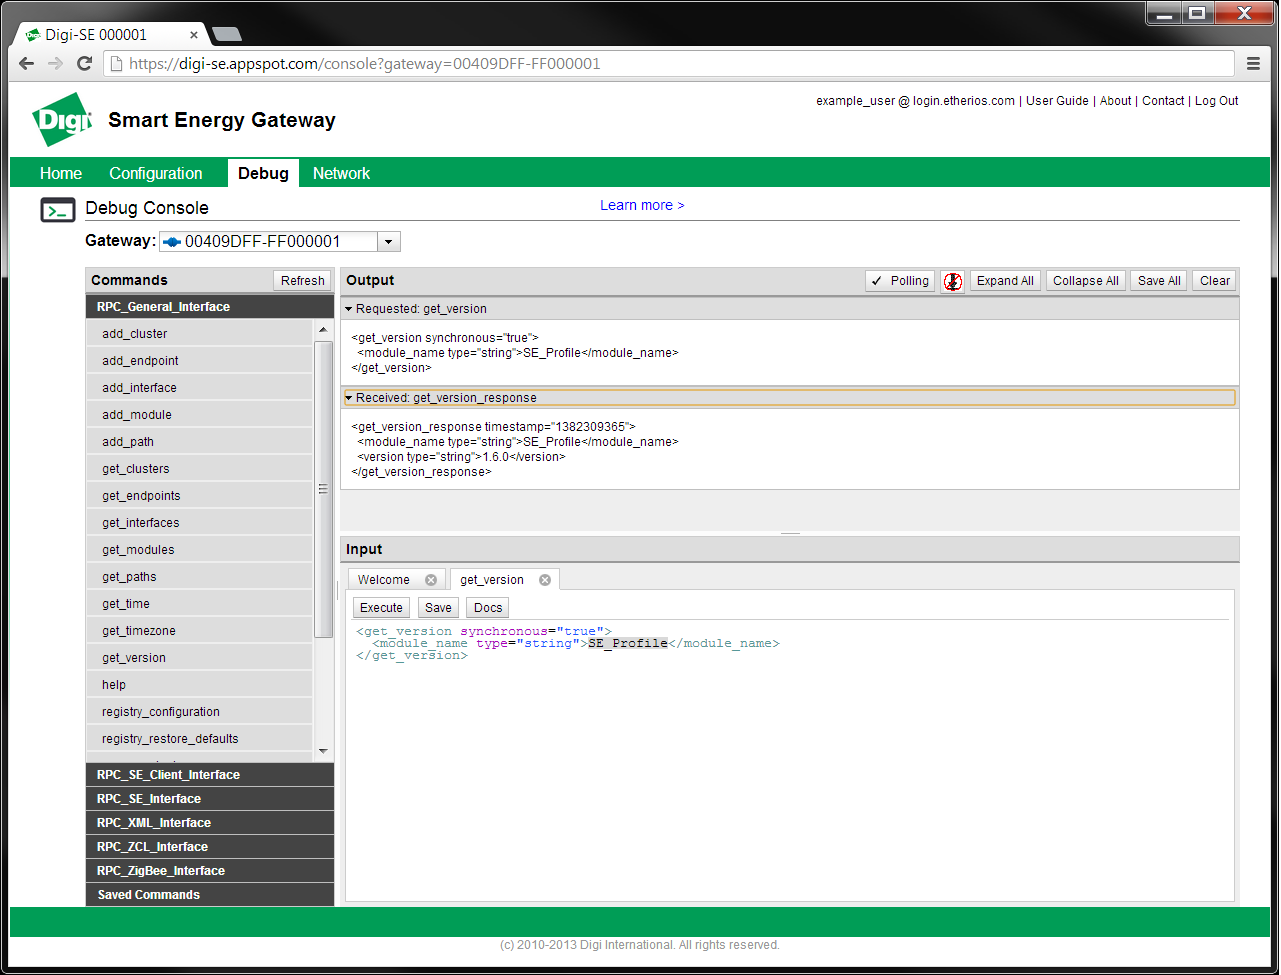
After a few seconds, a response should be displayed in the Output pane, labeled “Received: get_version_response”. You can click this box to display the contents of the response.
Sometimes you will receive a message without having sent a message first. See Asynchronous Message Reference to learn more. You can disable receiving asynchronous messages by clicking the button labeled Polling so that there is no check mark.
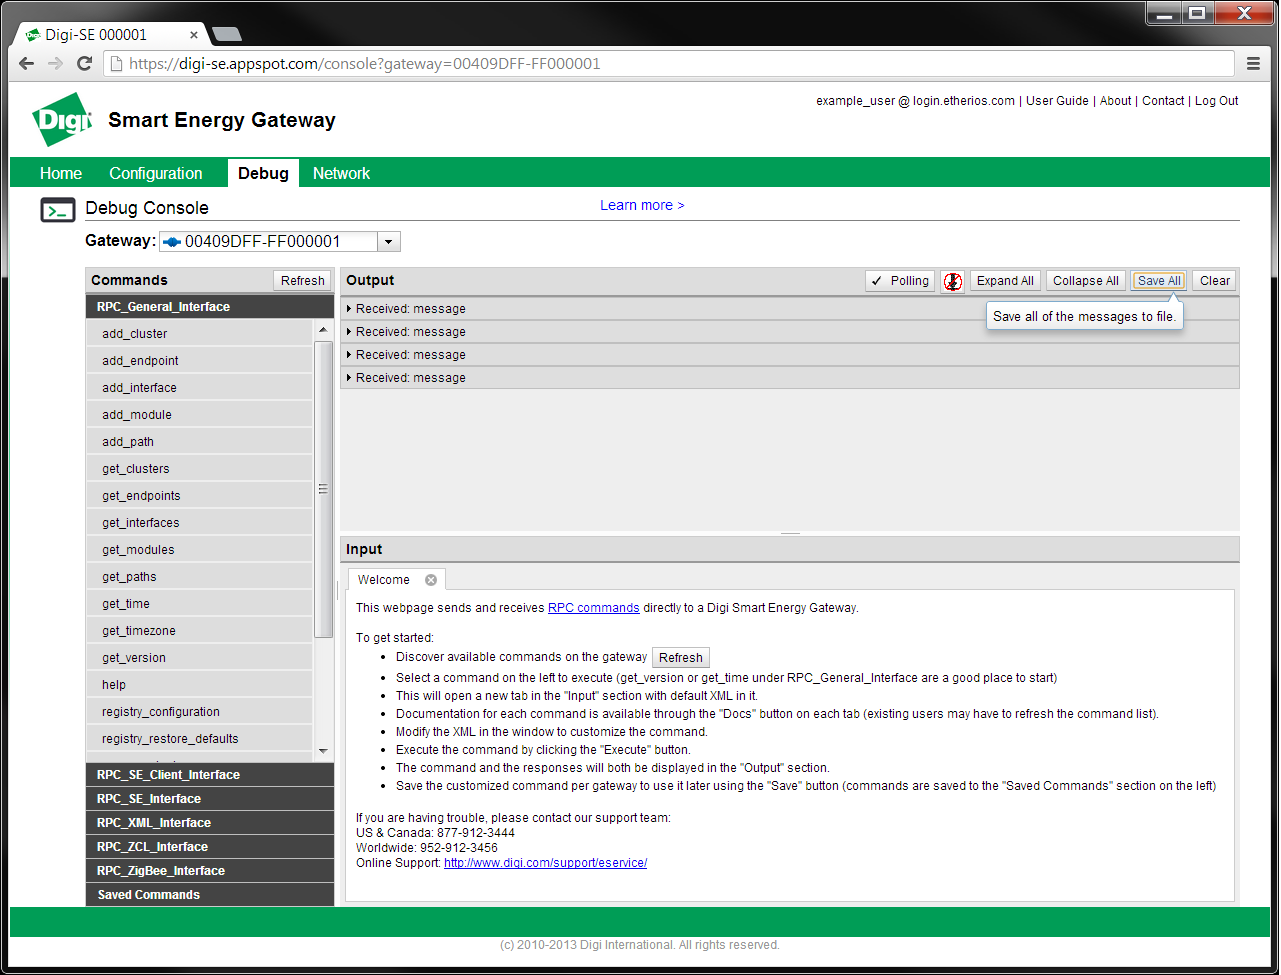
Go to https://digi-se.appspot.com/console and select your Digi gateway from the Gateway dropdown (see Gateway Selection). Make sure you have already discovered the available commands (see Discover Available Commands). The page should look like the following:
Click the button labeled Save All in the Output bar. This will download a file containing all of the messages in the Output pane to your computer.
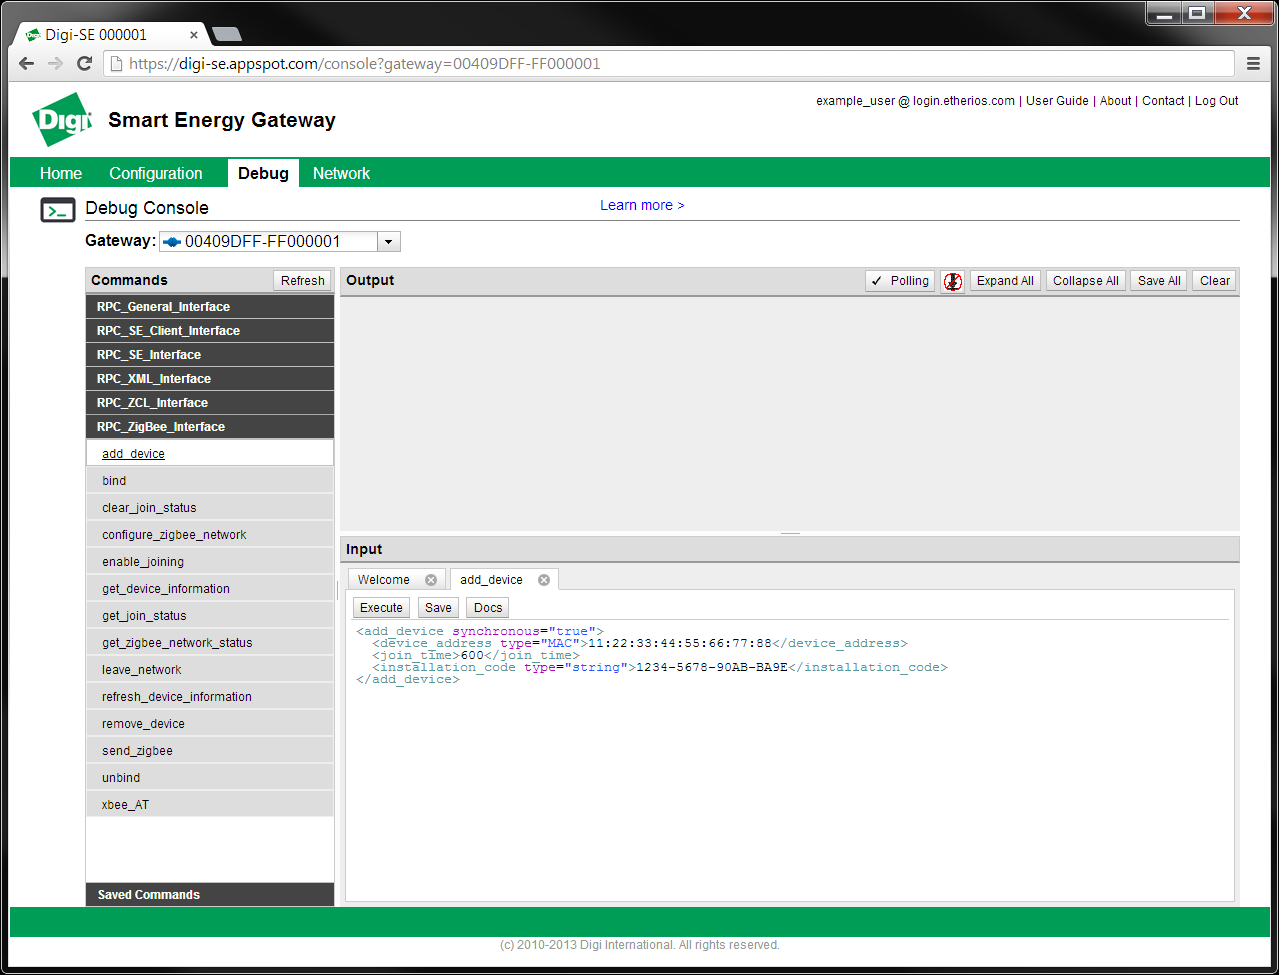
Go to https://digi-se.appspot.com/console and select your Digi gateway from the Gateway dropdown (see Gateway Selection). Make sure you have already discovered the available commands (see Discover Available Commands). The page should look like the following:
Select the command you want to be able to customize and save from the Commands pane on the left by clicking it. For this sample, we will be using the add_device command. This will load the command into a tab in the Input pane. The command will load with default XML.
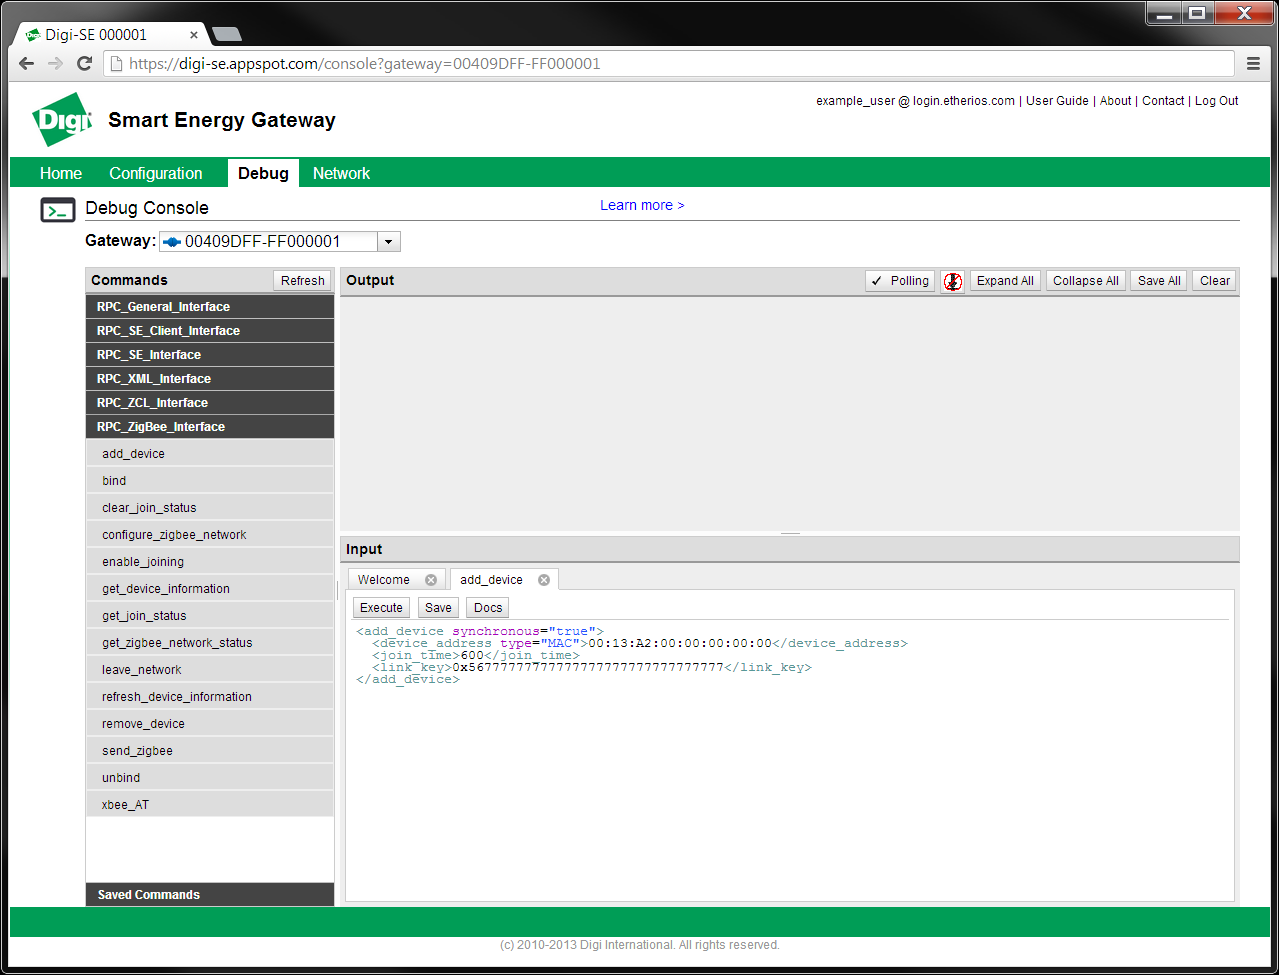
Customize the command with your modified XML. For this example, I’ll set the EUI and link_key.
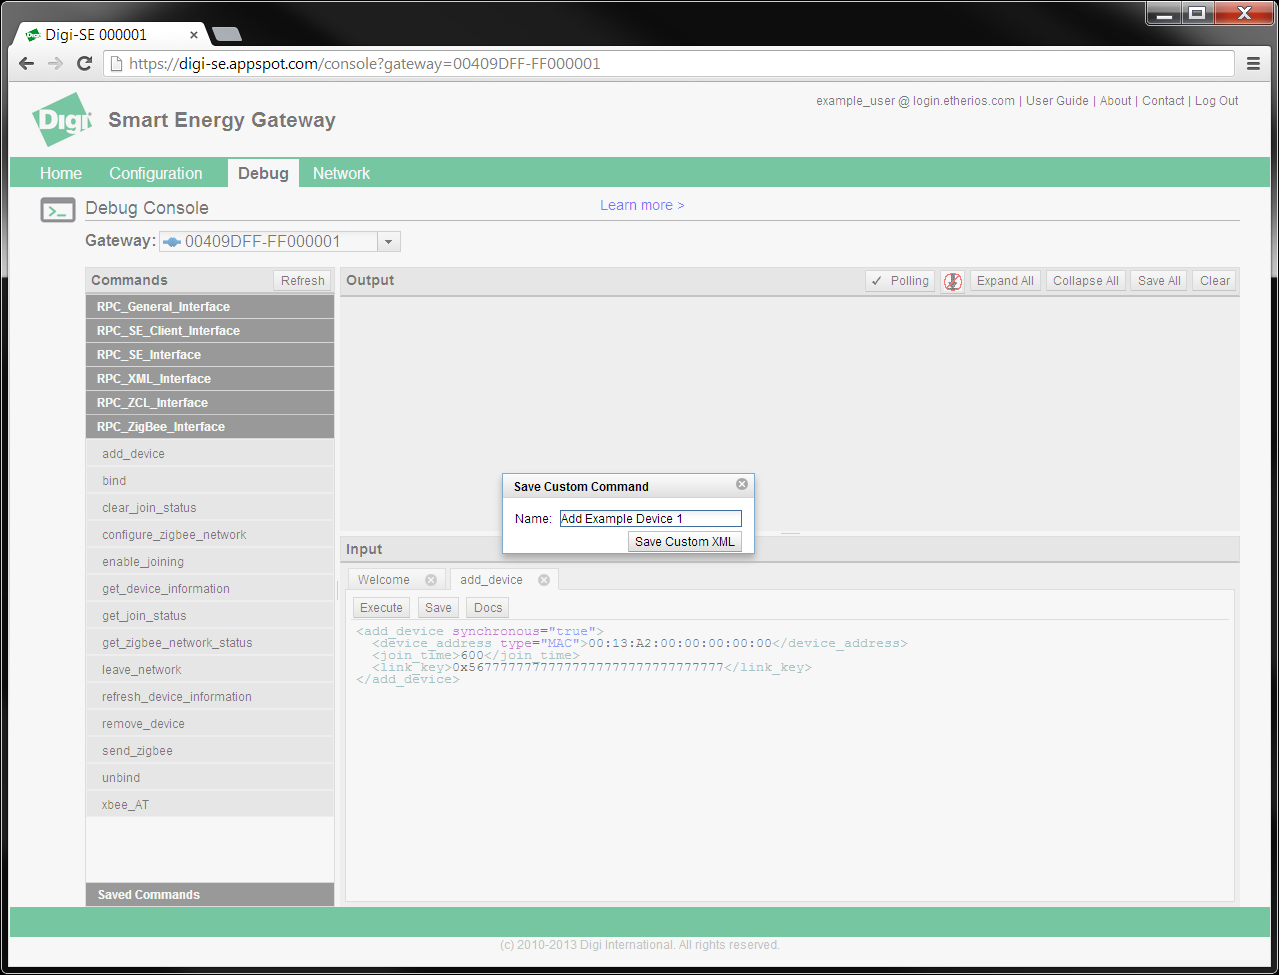
Click the button labeled Save to save your customized command. This will open a dialog where you can enter a Name for this command. I’ll use “Add Example Device 1”.
Click the button labeled Save Custom XML to save the command. The tab should now display the customized name of the command and the command should appear in the Saved Commands section of the Commands pane.
You can select the saved command at any time from the Saved Commands section. The saved commands are linked to your account and gateway. They will not appear for other gateways and will not appear if you move the gateway to another account. The Refresh button does not affect saved commands.
Click the button labeled Remove next to the saved command in the Commands pane to remove it.
2011-2014, Digi International Inc. All rights reserved.